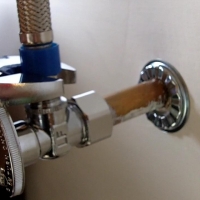
 How to Replace a Water Shut-Off Valve. Read these written Instructions to learn, step by step, how to replace a water shut-off valve for a toilet. The instructions accompany the how-to video “How to Install a Water Shut-Off Valve for Beginners.”
Time needed to complete project: 30 – 60 minutes, depending upon the type of the existing valve
Materials Cost: $20 – 30 for the new valve
DIY Savings by doing it yourself: $200
Tools and Materials Needed
• New shut-off valve, either a compression fitting, or a “push-fit” fitting, with a “quarter-turn”
• Channel Locks
• Adjustable wrench
• Screwdrivers, phillips and flathead
• Pipe Wrench
• Tubing Cutter, the smaller type
Step-by-Step Instructions
1. Shut the water off at the main. If possible, go to the lowest point in the house, such as a slop sink or basement bathroom, and turn on the water to drain the pipes as much as you can.
2. Drain any water from the toilet tank before beginning to work.
3. Remove the water supply line. Loosen it with your adjustable wrench, and then you can do the rest by hand.
4. Determine whether the existing valve is a compression fitting or if it is soldered on to the pipe.
a. To remove a compression fitting: You will be using your pipe wrench as a vise. Slip it under the valve and tighten it, to hold the valve in place. Loosen the compression nut with your adjustable wrench, and then loosen the nut by hand. The valve will then just slip off.
b. To remove a valve that is soldered on to the pipe: First of all, you need to ensure that there will be enough pipe left coming out of the wall for you to be able to install the new valve. If you have enough space, you can just cut the pipe at the valve, and then install the new valve. If you don’t have enough space, you will need to solder on a length of pipe first, before you can install the new valve. You will need a tubing cutter of a smaller size, as this is a confined space. Cut the shut-off valve off with the tubing cutter. Make sure that you clean the pipe with some emery cloth or steel wool so that it is ready for the new fitting.
5. Slide the compression nut on to the pipe.
6. Next, put on the brass washer.
7. Slide on the shut-off valve, and then tighten the compression nut by hand.
8. Using your pipe wrench as a vise, tighten it to the bottom of the new valve. It will hold the shut-off valve in place while we tighten the compression nut.
9. Tighten the compression nut with your wrench. Make sure that you tighten it at least half of a turn. It may not sound like much, but compression nuts tighten very quickly.
10. Re-connect the water supply line.
11. Turn the water back on at the main.
12. Turn the water supply line on. Check underneath it to make sure there are no leaks. If there are any leaks, just tighten up the compression nut a bit more.
And that is all it takes to install a new water shut-off valve! Congratulations, you did it!


As a homeowner on a tight budget, I needed to replace the toilet’s shut off valve myself. I must have watched 10 YouTube videos and read 3 or 4 articles before attempting this. Couldn’t get the old valve to come off and was frustrated beyond belief. I thought I’d have to call the plumber.
But then I watched Leah’s video and realized I was turning the old valve in the wrong direction! OMG! This sounds so simple, but the direction I got from other sites wasn’t correct.
Leah, thanks for providing such an easy to follow video, and with written instructions as well! You have such a calm, conversational style, and made me feel like I could do anything! Thanks so much!
Hi Esther, This is wonderful to hear! I’m so glad you were able to do the job after watching our video! That is why Leah tries to show every step of the job and doesn’t make assumptions about what people know or don’t know coming in to the job. Pass the word about us to your friends! Kind Regards, Karen
Found your YouTube page via a google search on this topic and will definitely be subscribing. Very clear, concise instructions without the rambling BS and “personality” of most others. One suggestion: watch your audio levels for consistency to avoid loud-soft-loud-soft volume. It forces some of us to constantly adjust the volume while trying to pay attention to your excellent instruction.
Thanks, Dennis! We are definitely going to be correcting our audio issues. Thanks for your helpful remarks!