August 31, 2016

Do It Yourself Tub Caulking: A How-To Guide
Written Instructions to Accompany the Video “How to Caulk a Bathtub with Beautiful Results”
Time Needed to Complete Project: 1 hour, plus approximately 24 hours for the curing time
Tools & Supplies Needed:
o Razor Blade Scraper
o Oscillating Multi-Tool with a scraper blade attached and/or
o Scraper
o Caulking Gun (optional, see note below)
o Safety Glasses
o Gloves
o Compressed Air, such as that used to clean computer keyboards (optional)
o Blue painters tape or blue masking tape
o Silicone caulking with mildew protection, preferably the type that is used in a caulking gun
(Note: If you do not have a caulking gun and do not wish to purchase one, you can use the caulking that is squeezed out from the tube by hand. This is acceptable, however, it is faster and ultimately less expensive to use a caulking gun)
o Plastic disposable spoon
o Small cup or bowl of water
o Paper towels for cleanup
Safety Note: Be advised to take precautions when using electric-powered tools (such as the oscillating multi-tool) in conditions where water may be present.
Steps to Complete Job
Part 1 – Remove Old Caulking
1. Don your safety glasses and protective gloves.
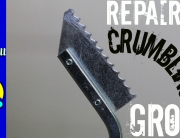
2. Detach Old Caulking: With the multi-tool turned on to a medium speed setting, insert the scraper blade into the caulking area between the tub and the tile. Moving the blade in and out, slowly move along the whole border of the tub. Alternatively (without a multi-tool), perform this same action manually with the scraper.
3. Remove Old Caulking: Pull out the caulking manually. You may need to tug on it a little, but some of it should already be coming out on its own. Use the manual scraper to pull out any caulk that appears to be stuck. Use the razor blade scraper to scrape away any of the residue that may still remain on the tub surface.
4. Additional Clean-Up: Using the compressed air duster, spray away all the debris that remains around and in the crevice between the tile and the tub.
Part 2 – Install New Caulking
1. Prepare surface with tape: The use of painter’s or masking tape will drastically reduce the amount of mess involved with installing new caulking, and will help you to maintain clean, straight lines. First, lay the tape along the tub surface, about ¼ to ½ inch away from the caulking area. Next, lay the tape along the tile wall, the same distance above the caulking area. Tip: To ensure that the tape is nice and tight, “lay down” the tape by running your gloved finger along the surface of it, pressing it down.
5. Installing the caulking: Regardless of which type of caulking you are using, snip off the tip of the tube with scissors or with the razor blade knife. The squeeze-tube type of caulking will be ready to go. If you’re using the caulking gun type, you will also need to puncture the inside of the tube and break the seal. Some caulking guns have a needle-type tool attached to be able to do this easily. If your caulking gun doesn’t have this, any sharp narrow instrument will do, such as a metal skewer.
Next, load the caulking gun or pick up the handheld tube of caulking. The application process is similar for both. Either squeeze the tube, or pull the trigger of the caulking gun, laying down a generous bead of caulk all around the tub. Don’t worry if it is somewhat messy at this point.
Then, take the plastic spoon, dip it into water, and, starting at one end of the tub, firmly press the back of the spoon into the caulk while running the spoon along the caulking area, pressing the caulk into place and creating a smooth surface. Confine your movement to inside the perimeter of the tape, and keep a paper towel handy for easy cleanup. Repeat for all sides of the tub, cleaning the spoon in the water and with a paper towel in between sides.
6. Very Important Note: Remove the tape immediately after laying down the caulking. This cannot be emphasized strongly enough.
7. Curing of the Caulking: Refer to the instructions on your tube of caulk to find out how long it should take to cure before taking a shower or using the tub.
And that is it. You did it! You have just completed your do it yourself tub caulking project!
Copyright 2016, See Jane Drill
Due to differing conditions, tools, and individual skills, See Jane Drill assumes no responsibility for any mistakes, damages, injuries suffered, or losses incurred as a result of following the information published on our website and in the videos and written instructions published through our website. Before beginning any project, review the instructions carefully, and if you still have any doubts or questions about how to complete the project, consult with local experts or authorities. Also, because codes and regulations vary greatly by location, you should check to ensure that your project complies with all applicable local codes and regulations. Always read and follow all the safety precautions provided by any tool or equipment manufacturer, and follow all accepted safety procedures.
See Jane Drill is dedicated to providing accurate and helpful do-it-yourself information. We welcome your questions, input and feedback about the information provided on this website.


Leave A Comment