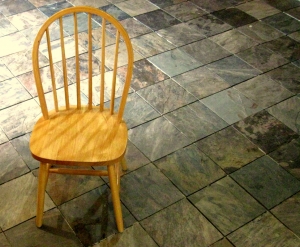
 How to Have the Slate Floor of Your Dreams on a Budget. I fell in love with slate flooring in a house that I was renting years ago. The slate floor was in the kitchen of the house, and let me tell you, it did wonders for what was essentially just a smaller kitchen in an older home. That floor made everything look newer, brighter and more modern. It looked gorgeous, absorbed water spills almost instantaneously, and needed just a quick once-over with a mop every so often to keep it clean and perfect-looking. I just knew that when I had my own home I was going to want slate flooring.
Fast forward to my current home, and what do you know? There is a perfect spot for a slate floor; the family room in the lower level of the mid-century house that we purchased last year and have been slowly working on. I decided on it for the same reasons that the slate was so wonderful in the kitchen of my rental years ago, which is that it is low-maintenance and it looks beautiful. And also, I now have a huge dog, and for sure don’t want him running in and out of the carpeted part of the house with his big muddy paws. The slate would be perfect!
Choosing the slate. Okay, so first I had to decide upon the type of slate that I wanted and could afford. There are two general types: gauged and un-gauged. The gauged type is uniform in size and thickness, and smooth on top. The un-gauged is basically rough slate…mixed thicknesses and a rough surface. While I would have loved to go with the gauged type for ease of installation, it was a lot more expensive…almost five times the price of the rough slate. Since the family room of my house is quite large and I knew I was going to need a lot of tile, I chose the un-gauged type. Depending upon your budget and the size of your room, it is entirely up to you to choose your slate. And you need to buy more than you think you need for the room, approximately 20% over the square footage, to account for breakage and fitting it into the odd corners and such. I will tell you that I spent approximately $900 for about 500 square feet of floor. A real deal, when you consider that the price of the gauged slate would have been about $4000 for the same amount! Yes, the rough slate is a little trickier to install. But, if I can do it, you can do it! Read on….
Preparing to lay your slate. This article assumes that you have a clean, hard sub-flooring surface ready on which to install your slate, such as cement backerboard or concrete. Believe it or not, (this was news to me), you don’t start laying your tile from one corner of the room! You have to use what is called a chalk line to mark out the area in which you will lay whole tiles, and then later on, you will cut pieces of tile to lay against the wall and up against doorways, etc. Picture it like a box inside of a box. Need more info on how to calculate how you will lay out your tile and figure out where to place the first one? Check out our video below:
Stacking the slate (aka the best strength-building exercise you are likely to get). You can skip the stacking part if you are using gauged slate….but this is an essential step for un-gauged slate. The idea is to keep like thicknesses together. The reason for this is that you want the finished floor to be relatively even. Some of this can be accomplished by “back-buttering” your tile with additional mortar in the laying process to even things up, but it is a lot easier if you are starting with tiles that are close in thickness to each other.
1. Separate the slate into three piles: Thick, Medium, and Thin. Just eyeball it, there is no measuring involved.
2. Pick out any particularly beautiful tiles and put them aside, as you will want to strategically incorporate them into your floor later
3. Set aside any broken, odd-looking, or particularly ugly tiles, as you may be able to use them later for the edges of the room.
Now, you are ready to start laying your tile!! In Part II, below, we will discuss how to dry-fit your tile, select the correct mortar or “thinset”, lay down the tile, and cut pieces for the irregular areas. See you next time!
BY KAREN DEVENARO, SEE JANE DRILL
Where Beginner Home Improvement Enthusiasts Come to Learn
Related Articles:
Slate Floor of Your Dreams on a Budget, Part II (Laying the Slate Tile Floor)
Slate Floor of Your Dreams on a Budget, Part III (Grouting and Sealing the Slate Tile Floor)


Leave A Comment