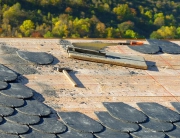
Grouting and Sealing the Slate Tile Floor
Well, if you’ve followed along with our last two segments, we are getting close to finishing our tile installation and having the slate floor of our dreams! In this article I will discuss how to grout and seal the new slate tile floor.
But first, here’s a quick recap and update of our last segment, which included how to use a wet saw to cut the tile for the edges of the floor. Once you have the skill of cutting tile down, you will also want to know how to make corner or combination cuts on the tile. These are needed when you have to make more than one cut in a tile to fit it around, say, a door frame, or in an odd corner of the room. An incredibly helpful way to make sure that the tile fits in the allocated space is to make a pattern out of foil or cardboard of the floor space first, trace it on to the tile, and then make your cuts. Watch the following video to learn how to both make your pattern and then make the corner cut on your tile. Once you install these final tiles into the unique spaces in your room, you will be ready to start grouting!
Grouting and Sealing the Tile
You will need:
-sanded grout in the color of your choice.
-bucket to mix up the grout
-bucket trowel (or any other tool with which you can scoop the grout out of the bucket)
-large sponge
-bucket of water
-rubber grout float
-Sealer for stone tile
-paint brush
-gloves
-knee pads
-buffing cloth (an old terry towel will work perfectly)
Sealing the slate tile is a two-part process. The first application is actually brushed onto the slate tile before grouting. The reason for this is that slate tile is porous, and the sealant acts as a “release” for the grout that gets onto the top surface of the tile during the grout installation. In a nutshell, the first application of sealant allows you to clean up the grout quickly and easily as you go. Be sure to let it dry for a couple of hours before grouting.
Next, mix up your grout according to the manufacturer’s instructions. You will want to grout one small section of the floor at a time from start to finish, then move on to another section. We recommend somewhere between 8 and 10 square feet at a time. Scoop on your grout. Spread it out with the float, forcing it into the grout lines. You will want to move the float diagonally across the tiles to avoid pulling the grout out of the grout lines. Then use the float to scrape up as much excess as possible. Wipe the tiles clean with a damp sponge. You will need to do this several times, and change your water as well. When dry, buff with a towel. Move on to the next section, until the whole floor is done. Allow the grout to cure for two to three days, then apply your second and final coat of sealant to the floor.
And finally, you will have the slate floor of your dreams, and not break your wallet!!
Related Articles
How to Have the Slate Floor of Your Dreams on a Budget, Part II (Laying the Slate Tile Floor)
How to Have the Slate Floor of Your Dreams on a Budget, Part I (Introduction to How to Lay a Slate Tile Floor)
BY KAREN DEVENARO, SEE JANE DRILL
Where Beginner Home Improvement Enthusiasts Come To Learn


Leave A Comment