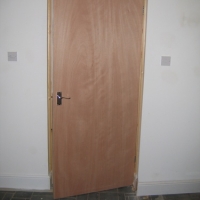
Hanging a new door is not as difficult as it might seem. Perhaps you have a doorway that needs a door, or maybe you just want to replace a door in your home, but the jamb is still perfectly fine. This job is something that you absolutely can do on your own, with some basic tools and a little know-how.
First, watch the video, “How to Hang a New Door on an Existing Jamb“,
There’s no need to take notes, because we give you the complete step-by-step instructions below, including a list of the tools and materials you will need. (a printable version follows at the end)
You Can Do This!
How to Hang a New Door on an Existing Jamb (Written Instructions)
Time needed to complete project: 1 hour
Materials Cost: Cost of door, which runs from $20 to $40
Tools and Materials Needed
• New door
• Hammer
• Sharp chisel
• 2 wooden paint stir sticks
• 1 package of shims
• Screwdriver (regular or cordless)
• Pencil
• Safety glasses
• Tape measure
Step-by-Step Instructions
1. Dry-fit the new door into the door frame, by placing it into the door frame. There will be a large gap at the top.
2. Take the wood paint stirrers and place them into the opening at the top between the door and the door frame. Place one on the right side and one on the left side. These will act as placeholders to maintain the gap between the top of the door and the frame as you continue to fit the door.
3. Place the shims underneath the door, between the bottom of the door and the floor. Tap on the shims with a hammer to raise the door into place. You should have two, one on the left side and one on the right side.
4. Mark the location where the existing hinges will go on the new door with a pencil. Make sure to mark both the top and bottom hinge locations on the door. It can sometimes be helpful to use a piece of wood as a guide to do this.
5. Remove the door from the jamb.
6. Measure the distance from the barrel of the hinge to the door jamb. It should be slightly offset to allow the door to swing freely. Usually the distance is about ¼”. Measure it to be sure.
7. On the new door, continue your marks on the side of the door to mark the location where the hinge plate will go.
8. Set the hinge plate in place, remembering that it needs to be offset so that the distance from the jamb to the end of the hinge plate is ¼”. Draw an outline with your pencil around the location where the hinge will go.
9. Using your wood chisel, outline the area where you will be cutting out part of the door to set the hinge. To do this, make sure that the flat side of the chisel is facing out. Tap it with a hammer. Repeat all the way around the outline of where the hinge will go. If the hinge has a rounded edge, you may want to get the rounded corner with a utility knife.
10. Chisel out the wood inside the outline. Keep in mind that you want the amount of wood that you chisel out to be the same thickness as the hinge. Once you have created the space, smooth it out as best you can. To smooth it out, you will want the beveled side of the chisel to be facing out and the flat side to be facing down.
11. Fit the hinge into place and mark the holes with a pencil. The hinge should be flush with the wood.
12. Pre-drill the holes, or, if you don’t have a drill, you can create pilot holes with a finish nail.
13. Screw the hinges into place.
14. Now it’s time to hang the door. It’s best if you start with the bottom hinge first. Lubricate the pens first if you need to. Tap the pens into place with a hammer.
15. Check to make sure that the hinges are moving freely, and shut the door.
And that’s it…You did it!
Copyright 2015, See Jane Drill


Just replaced a door this weekend. Wish I’d watched this first to build my confidence and learn the trick with the paint stirrers! Unfortunately I had to plane the door down on each side for it to fit (less than 1/8″ on each side). Thanks to my grandad’s hand plane with a still sharp blade, I managed to get the bulk of it off and touched it up with my belt sander. In the end it worked and the door fits perfectly!
Way to go Jenny, you did it! Sounds like you figured everything out and did a great job. 🙂