September 15, 2015
DIY Tips to Revamp Your Walls Back to Former Glory
Contributed By James Javier, Country Club Homes, Tagaytay, Phillipines
Even a well-built wall may sustain different forms of damage over time. And oftentimes, fixing damage that’s been ignored for too long comes with a high price tag. If needed, you can take matters into your own hands and revamp your walls yourself – saving money in the process. Here are some DIY tips that can restore your walls back to their former glory, and ensure that your home is structurally sound.

Using Lightweight Spackle
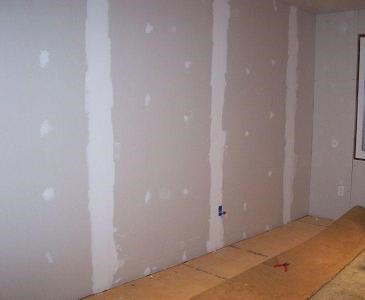
For tiny dents and holes on drywall, you can use lightweight spackle to easily fix these defects.
First, use a putty knife to scrape away any surface debris. Try not to make the hole bigger as you do so.
Next, apply lightweight spackle to fill the hole. Feel free to use as much as needed to evenly fill the entire hole – just let an application dry first before adding more. Use a sanding sponge to even the surface before repainting.
Using Patch Kits
Patch kits are effective for drywall holes that are up to 6 inches large. For example, a hole made by a doorknob can easily be fixed using the following steps:
Step 1: Attach Patch Kit
Cover the hole with your patch kit by sticking the adhesive side on the wall.
Step 2: Apply the Joint Compound
Next, use a drywall knife or putty knife to cover the patch with the joint compound. Apply the compound diagonally into two overlapping directions.
Step 3: Even the Edges
Even the edges to make sure the compound blends with the wall surface. Let the compound dry. Add another layer if necessary, and even before repainting.
Using Pre-mixed Concrete

A hairline crack is the most common damage that can occur in concrete walls. Even the smallest crack can ruin the look of your wall – not to mention that the problem can escalate into a bigger crack. Hopefully, this article has reached you before the crack gets too big.
While it’s still small, the best way to fix a crack on a concrete wall is to use pre-mixed cement. Simply fill the crack well and remember to even the surface using a trowel. Finish the job by brushing the surface to replicate the original wall’s pattern.This is probably the easiest DIY method for repairing wall cracks.
Using an Epoxy Kit and Liquid Concrete
A better alternative to pre-mixed concrete would be an epoxy kit, which comes in repair kits with everything you need for crack repair. This includes injection surface ports, gloves, a caulk injection tool, and other sealing accessories. Here are the general steps for applying epoxy repair kits:
Step 1: Clean the Crack
First, be sure to brush the crack and the surrounding area to make sure it is free from dust and debris. You may use a vacuum cleaner or compressed air to ensure a thorough cleaning.
Step 2: Cover the Crack
Usually, epoxy sealants come with two different compounds that should be mixed before use. Use the epoxy mixture to seal the surface of the crack, while leaving gaps for every 10-12 inches of the crack.
Step 3: Stick Injection Ports
Use epoxy paste to stick injection ports into the gaps you’ve left earlier. Better yet, use 10d nails to secure these ports from the center. Apply the epoxy mixture over the entire flange of these ports.
Step 4: Wait
Wait for around 10 hours or until the prescribed time in your specific repair product before proceeding with the injection. Make sure to start at the lowest injection port to prevent air pockets. Once the port oozes, move on to the port above, until you’re done.
It may take anywhere between 1-5 days before it cures. Be sure to refer to your repair kit’s documentation for this. When done, you can remove the ports with a sharp tool and a hammer. Use a hand sanding disk to even the surface.
Keep your home fresh from the inside out; like the ones in Country Club Homes Tagaytay, Philippines. Sometimes it’s better to repair things one at a time, so be sure to inspect and repair the smallest imperfections on your walls while you’re at it!
Author Bio:
James is a part-time blogger and a marketing guy for Country Club Homes, Tagaytay, Phillipines. His research consists mostly of Home Decoration and Improvement, and when he’s not busy sharing his insights in design, he usually spends time with this family and friends.


Leave A Comment