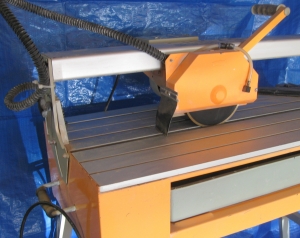
How to make a corner cut or combination cut in floor tile with a wet saw, as shown in the See Jane Drill video: How to Make a Corner Cut in Tile with a Wet Saw. This technique is helpful to know when tiling around doors or in other oddly shaped areas of the room.
Tools & Equipment Needed
- Wet Saw (if you do not own one, you can rent one by the day from your local home improvement store)
- Safety Glasses
- Black Marker
Access Requirements
- Electrical Outlet
- Hard flat surface on which to place the wet saw, and room to move around it
- To review instructions on how to use a wet saw, refer to the See Jane Drill video “How to Use a Wet Saw to Cut Slate Tile”.
Steps to Complete the Job
- Make a “pattern” out of cardboard for the shape of the tile that you would like to cut. (To review how to do this, watch the video “How to Make a Corner Cut in Tile with a Wet Saw”, for instructions on how to make the pattern.
- Next, put on your safety glasses.
- On a working surface, lay down the piece of tile, right side up, that you will be working with, and lay the cut cardboard pattern over the tile.
- Lift the pattern from the tile, and slide it underneath the tile in the same position.
- Then, flip the tile over, so that the pattern is now on top of the back side of the tile.
- Using your marker, trace the edges of the pattern where you will be cutting the tile. Be sure to use a marker so that you can see the line once the tile gets wet.
- Cutting the tile: Operating the wet saw according to the manufacturer’s instructions. You will be cutting the tile on the back side. Line up your tile along the first cut line. However, before you start cutting, here is a professional tip: Cut the tile beyond the corner where the line ends, by about ½ an inch. You will only be able to see the cut on the back side of the tile, but this is what will enable the tile to be cut all the way through and to fit properly in the designated space. The “overcut’ will not be visible from the top side of the tile.
- Make the second cut on the tile, using the exact same method as described in step 7.
- Flip the tile over, and observe your perfect combination cut on the top side. The tile is ready to install!
- Lastly, it’s time to install the tile.
Copyright 2013, See Jane Drill All Rights Reserved
For further information about the task described in this worksheet and the tools and materials needed to complete this job, refer to seejanedrill.com
Due to differing conditions, tools, and individual skills, See Jane Drill assumes no responsibility for any mistakes, damages, injuries suffered, or losses incurred as a result of following the information published on our website and in the videos and written instructions published through our website. Before beginning any project, review the instructions carefully, and if you still have any doubts or questions about how to complete the project, consult with local experts or authorities. Also, because codes and regulations vary greatly by location, you should check to ensure that your project complies with all applicable local codes and regulations. Always read and follow all the safety precautions provided by any tool or equipment manufacturer, and follow all accepted safety procedures.
See Jane Drill is dedicated to providing accurate and helpful do-it-yourself information. We welcome your questions, input and feedback about the information provided on this website.
Click HERE to Download Printable Version of Written Instructions


I need to make a circular cut in porcelain for my water pipes in the tub. Can’t finish this two year project becuz of this HELP!!!
Hi Carrol, You’re in luck…we just posted a video on how to do this on youtube. Here is the link: http://youtu.be/iIzFK7d2GZ8
Hope this helps!
Regards,
Leah
I was able to find the appropriate video showing how to make the circle in porcelain..I try and save all of your posts. Thank you so much…I can hardly wait to complete this project. You are awesome!! Best Wishes
That’s great, thanks, Carol! I’m glad it was helpful.