 March 17, 2015 How to Lay a Slate Tile Floor in Thinset
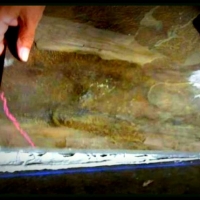
When you are laying a slate tile floor, once you figure out where to lay the first tile, the most challenging part of the job is done! Now you can actually have some fun with this.
The next step is dry-fitting the tile. You start with that first tile, and work out from it. It is best to dry-fit one or two rows at a time. The objective of dry-fitting is twofold: The first reason is that you need to make sure that you are fitting somewhat like-height pieces next to each other so the top of the floor is even. The other objective of dry-fitting is to ensure that your most attractive tile is in the center of the floor, where it is most likely to be seen. Before beginning to lay the tile, you will want to set aside any unique or especially beautiful tiles, and save them to place in the most visible areas of the floor.
Tip: Once you have dry-fit the area that you are working on, remove the tiles in order and stack them at the end of each row, so that you can remember how they go when you actually begin the tiling process.
Mixing the Mortar and Laying Down the Tile
Mixing the mortar (thin-set).
List of Tools and Equipment
–Power Drill with mixing paddle bit or bucket trowel
-5 gallon bucket
-a bag of spacers (at least ¼ inch)
-notched trowel
–margin trowel or paint scraper
-large sponge
-small bucket with clean water
-piece of chalk
-anti-fracture membrane (comes in liquid, paste or sheet form)
-knee pads (optional, but recommended)
And of course, you will need mortar. Just make sure you purchase the type that is appropriate for stone, slate, travertine, etc, also known as acrylic fortified thinset. Mix it up according to the package directions. This is where the power drill comes in handy, as it makes the mixing job a breeze. However, it is also fine to mix it by hand with a bucket trowel. It is important to ONLY mix the amount you will use in one work session, as it doesn’t “keep” once it is mixed and in fact will turn into a brick, so be sure to wash out your bucket and tools in between work sessions as well.
Laying the tile
Start by filling any cracks in the concrete slab that are larger than 1/8″ width with concrete epoxy. If you are using backer board, tape every seam with mesh tape, then cover the seam with a thin coat of mortar.
Important Note: When laying tile on slab concrete, you must use an anti-fracture membrane. This is to protect your finished tile floor from damage due to expansion and contraction of concrete or shifting of the earth beneath the home. Lay down the membrane after filling the cracks and before putting down the mortar. The anti-fracture membrane is suitable for backer board as well.
Also, you will want your working surface to be level. If it dips at all, you can smooth over some mortar and let it dry before beginning to lay down the tile.
Next, one row or one portion of a row at a time, you lay down your mortar with a trowel. Just lay it down with the flat side of the trowel, and then before placing the tiles in the row, you will want to score the surface of the mortar with the notched side of the trowel. This creates a suction action that ensures that the tile will stick to the floor. For a demonstration on how to lay down the tile, see the following video:
Cutting the tile for the edges of the floor. Sometimes a video is worth a thousand words! Or photos, for that matter. Check out the following video which shows how to use a wet saw to cut floor tile. Don’t forget that you don’t have to actually buy the wet saw, you can rent them from many home improvement stores.
And that is how you lay down a slate tile floor! See “related articles” below for more information about other stages of the process.
BY KAREN DEVENARO, SEE JANE DRILL
Related Articles:
Introduction to How To Install Slate Tile Flooring (includes how to lay out the tile and determine where the first tile will go)


Leave A Comment