June 25, 2015 Fix Tub Shower Diverter and Spigot.
How many of us have lived with the problem of losing water out of the tub spigot while we are using the shower? Well, there’s good news. You can fix this problem easily yourself by replacing the shower diverter and spigot.
No more annoying drip out of the faucet, and no more wasting water…it’s a win-win!
How-to Video: “How to Replace a Bathtub Shower Diverter for Good” by See Jane Drill.
Written Instructions
Time needed to complete project: 15 Minutes
Materials Cost: Approximately $15
DIY Savings: Approximately $150
Tools and Materials Needed
• New Bathtub Spout/Spigot with shower diverter
• New Nipple (a piece of pipe that is threaded on both ends). Be sure to purchase a nipple in a metal that matches your existing plumbing, i.e. copper to copper, brass to brass, galvanized to galvanized.
• Pipe Wrench
• Plumber’s tape
• Pipe sealant, a.k.a. “Pipe dope”
• An old rag or towel
• Silicone caulk (optional)
Step-by-Step Instructions
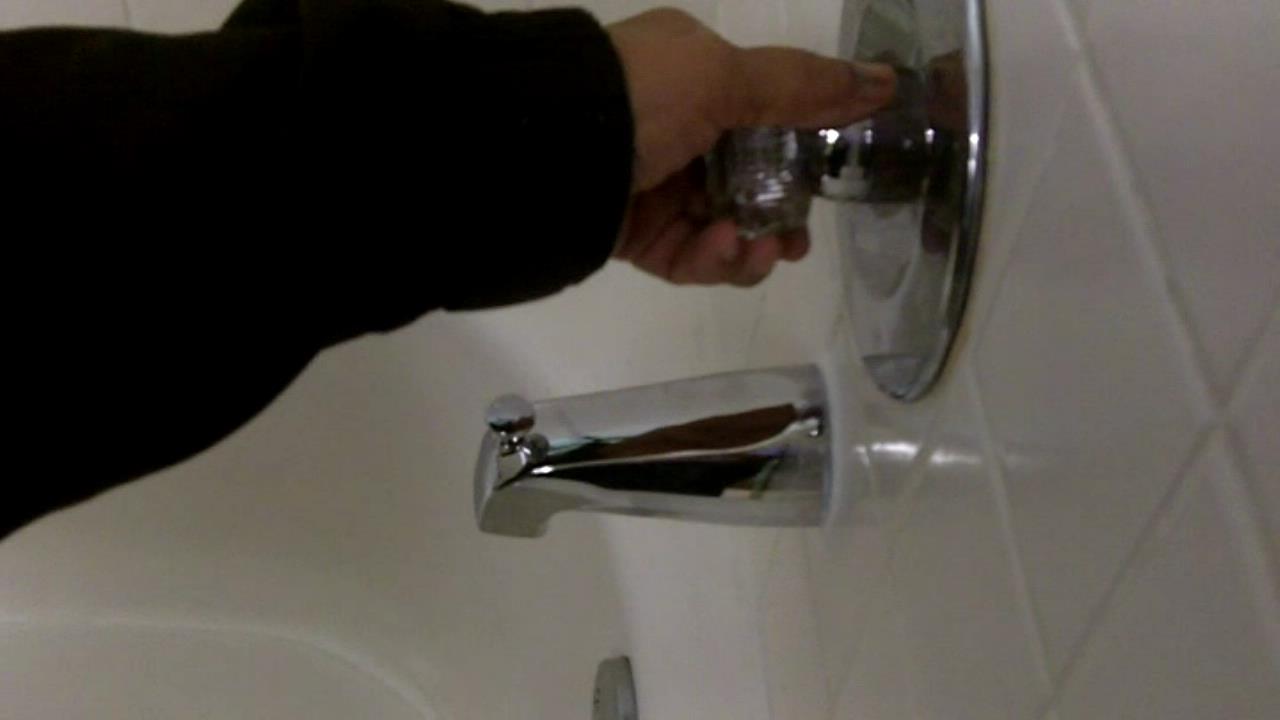
1. Using your pipe wrench, loosen the tub spigot. You will want to grab on to the spigot from underneath, and pull up and toward the left. You may need to use some force. Since you will be replacing the spigot, you don’t need to worry about getting scratches on it.
2. Once the spigot is loosened, you can turn it by hand to remove it.
3. Wrap both ends of the nipple in plumber’s tape, being sure to wrap counter-clockwise, so that when you screw in the nipple, the tape will stay on.
4. Apply a light coating of pipe sealant to the end of the pipe that will be inserted into the wall. This will help to ensure the security of the seal.
5. Screw the nipple into the wall side, taking care to not cross-thread. Tighten it by hand as far as you can, and then put your pipe wrench on it to tighten. You want it nice and tight, but don’t over-tighten it.
6. Thread the spigot on to the nipple, taking care again to not cross-thread.
7. Tighten the spigot with the pipe wrench. This time, you will want to place an old rag between the wrench and the spigot, to protect the new spigot from scratching.
8. (Optional step) You may want to put a bead of caulk around the base of the spigot where it meets the wall.
9. Test both the spigot and the diverter to ensure that everything is working.
And that is all it takes to install a new bathtub shower diverter and spigot! Congratulations, you did it!
By See Jane Drill, Copyright 2015
Click HERE for Printable Version of Written Instructions

Leave A Comment