How to Build a Partition Wall (Framing) – Step-by-Step Written Instructions to Accompany the Video “How to Build an Interior Wall Beginner’s Guide” at See Jane Drill.
Tools and Materials Needed
- Enough lumber for the top plate, bottom plate, and studs for your wall (amount will vary depending upon the specifications of your wall)
- pencil
- Speed Square
(or any square will work)
- plenty of 16 penny nails
- hammer
- saw
- tape measure
- Level
(The longer the level, the better. It would be best if you used a regular level as opposed to a torpedo level)
- shims
Preparing and Measuring
1. Measure and cut the wood for your top plate, bottom plate, and studs. (Note, when determining the height of your wall, subtract about 1/2″ from the height to enable you to set the completed framed wall in place later on)
2. Take the 2 2×4’s that you will be using for the top plate and the bottom plate, and line them up together so that the ends are even.
3. Measuring with a measuring tape, mark one of the plates at 16 inch intervals down the length (a.k.a. “16 inches on center”, which we will explain in detail in item number 5)
4. Using a speed square, strike a line with your pencil across the top and bottom plate at each 16-inch mark. This is where the studs will go.
5. For an example of what 16 inches on center really means, try this: Take one of the 2x4s that you will be using for the stud, and mark the center of it. Keep in mind that the width of the 2×4 on the narrow side is actually 1-1/2 inches, not 2 inches, so your center mark will be at 3/4″. Line the mark you have made on the stud up with mark you have made at 16 inches in on the plate. This is what 16 inches on center means. The measurement from the center of one stud to center of the next stud should be 16 inches (as opposed to measuring from edge to edge).
Building the Partition Wall
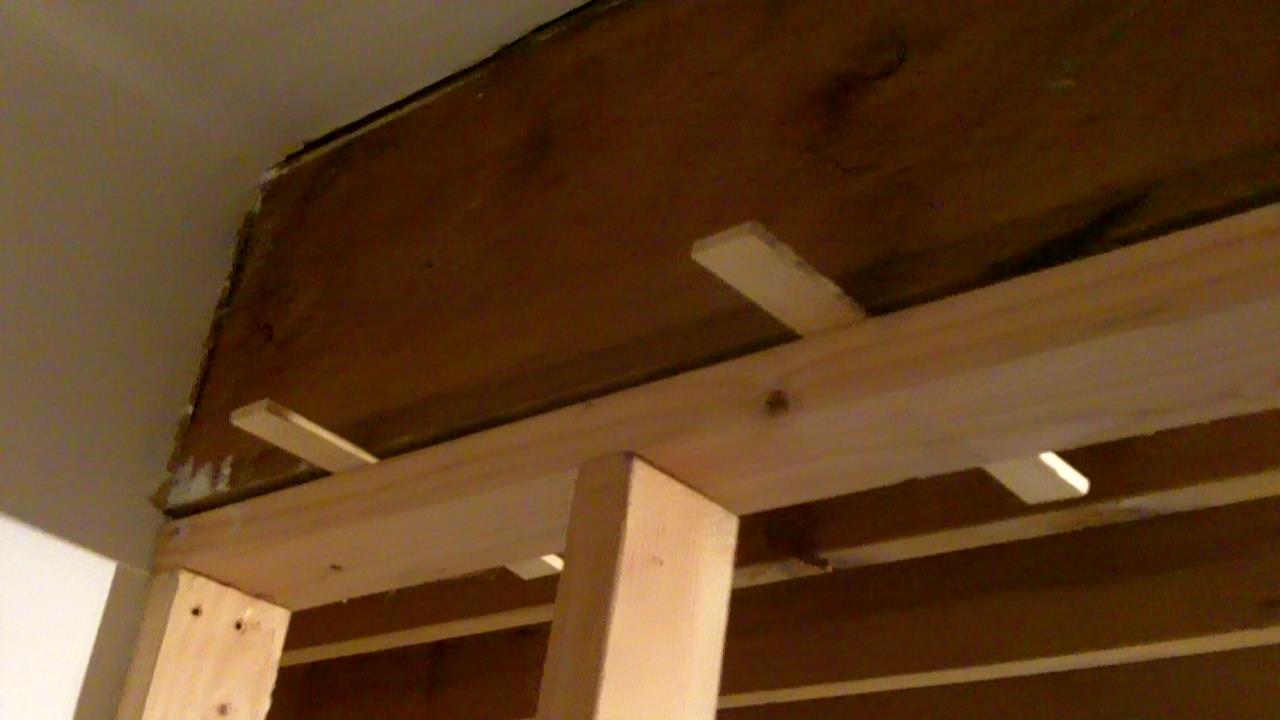
6. Brace your bottom plate against a hard surface such as an existing wall or partial wall.
7. Using your foot to stabilize the top plate and the first stud, drive your first nail through the top plate into the stud. Then, drive a 2nd nail. You will always want to use 2 nails per stud for the studs on the outside of the frame.
8. Move on to the center stud(s), and repeat the process, making certain that your interior studs are lined up correctly at stud center, and you should use your foot to stabilize the stud as you drive the nail. Repeat the process until you have attached all studs to the top plate.
9. Next, attach the studs to the bottom plate, using the same method described above.
10. Stand the frame up, and set it into place. (Note: You will need another person to help you set it in place). Line it up against your chalk line on the bottom, and tip it into place diagonally (that is why you allowed for 1/2″ space at the top earlier, when you were making your measurements, so that you could clear the ceiling.)
11. Next, you will need to shim your wall. You can do this from either the top of the wall or the bottom of the wall, depending upon which is easier for you.
12. To shim the wall, you will need to take 2 shims, and coming from both sides of the wall, slowly insert the thinner side of each shim towards each other. Once the shims are in place, you will want to tap each side with a hammer, to ensure a snug fit. Do this in several places along the wall, depending upon how big the wall is.
13. Next, check to make sure that everything is plumb, by using your level up against a stud. Check to make sure it is plumb both from front to back and from side to side. If it isn’t, you might need to tap the frame a bit in the appropriate direction.
14. Once everything is in place, snug, and plumb, you will nail the frame into place. Afterward, you can cut the shims off (the parts that are sticking out). You can use those same 16 penny nails to attach the frame. However, if you need to nail the frame into a concrete floor, you will need to use different hardware for that, which we show in this video: Best Way to Drive a Nail Into Concrete
Note: If you are building your partition wall in a basement, local building codes may require installation of a floating partition wall. Check the building codes for your area to be sure.
And that is all it takes to build or frame a partition wall!
You Can Do This!
by See Jane Drill, Copyright 2016, All Rights Reserved


Leave A Comment